In this article we will show how to add WireGuard support to the existing Pritunl OpenVPN installation. In case you are starting from scratch, you can first read our article about how to setup Pritunl VPN server and then come back here.
There are instructions available about Wireguard and Pritunl, but the process is not fully clear and we faced different issues during the setup. That’s why we decided to cover it in this guide.
Overview
Wireguard is a new VPN protocol. Both OpenVPN and Wireguard use AES-256 encryption, open-sourced and considered equally secure. However, WireGuard is lighter in terms of code, faster and has less attack surface. In the same time, OpenVPN proved to be highly secure and trusted through many years and numerous audits.
Adding WireGuard support to Pritunl
There are several steps both client and server side to be made to enable Wireguard support within Pritunl server installation. We will cover all of them.
Server-side configuration
- Update server packages.
sudo apt-get updatesudo apt-get upgrade - Install Wireguard
sudo apt install wireguard - Install and enable dynamic kernel module support
sudo apt install wireguard-dkmssudo dkms autoinstall
Check status withdkms status
Enable Wireguard in Pritunl
Login to your Pritunl admin. Go to “Servers“. Make sure you “Stop Server” before you make any changes. Then go to server configuration, like it’s shown on the picture below.

In the next window you will need to mark “Enable WireGuard”, set “WG Port” (you can use the next to your regular OpenVPN port) and “Virtual WG Network”. Check on the picture below to see the settings in our use case scenario.
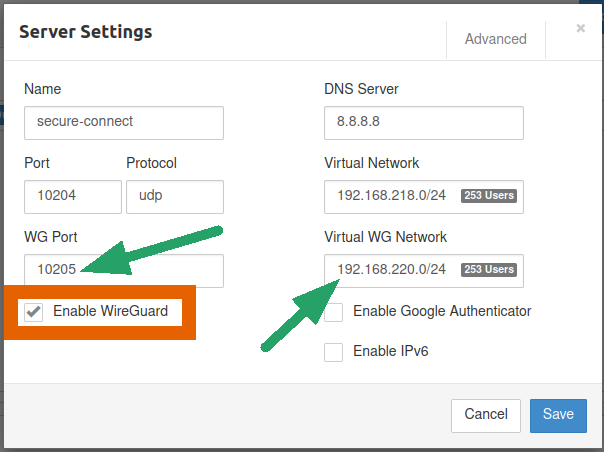
Click Save.
Reboot Pritunl using this command: sudo systemctl restart pritunl.service
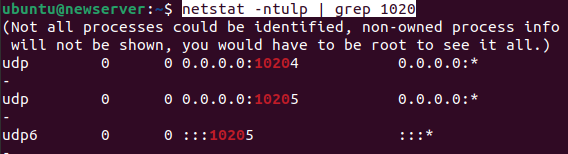
Check if the server is listening on the WG port you set: netstat -ntulp | grep 1020
At this point the server-side configuration is finished. We would suggest to re-create the OpenVPN connection profiles. Now let’s move to the client side.
Client side configuration
In order to utilize WireGuard tunnel you will still need its native client although you connect via Pritunl client. So, your next step will be downloading and installing WireGuard client.
WireGuard client installation
- Download and install WireGuard
- Reboot
- Make sure you see WireGuard icon in the tray.
Run Pritunl
- Start Pritunl client. We assume that you have it installed already.
- Import new profile
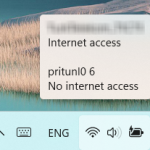
- If you completed all the steps correctly, you will see two connection options in your Pritunl client: WireGuard or OpenVPN, like on the picture below.
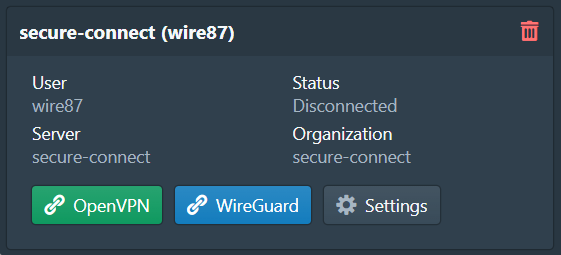
Press WireGuard to connect via new tunnel. That’s it.
We have learned how to enable WireGuard support in Pritunl OpenVPN. We hope you enjoyed reading. Now have some fun with new protocol testing.