[Update 08/16/2022: Both parts merged]
In this article we will cover how to run your own Bitcoin payment gateway and accept Bitcoin payments on your website directly. There are numerous Bitcoin processing companies, but if you are a true fan of Bitcoin (or some other cryptocurrency) you would love an idea of running your own gateway. If you want to have an idea how it looks like, you can check our latest article about “How to host website anonymously and pay with Bitcoin” as it gives some info how this gateway looks and works. Today we will learn:
Part 1
- Why your store should accept Bitcoin
- BTCPayServer as a payment gateway
- Bitcoin Gateway functionality
- Requirements
- Installation
Part 2
- Configure our first store
- Setup Bitcoin Wallet
- Enable Altcoins via SideShift
- Create a Payment request (to verify how it works)
Advantages
Running your own Bitcoin gateway gives you freedom of payments, including cross-border transactions. You are not dependent on the policies of the third-party company and you know that the money you receive from your clients will be yours. Moreover, the fees are at the lowest level right now. Comparing to credit card processing fees ranging from 5% to 10% (and $1-$2 minimum per tx), Bitcoin gives you clear advantage by having the median transaction fee of 5 cents.
The next important thing is that Bitcoin is an appreciating asset due to its deflationary model. So, besides having fun of being your own bank and processing company you will be “stacking sats” – a rare and valuable asset. Look at the chart below.

BTCPay Server
Back in 2017 Bitpay was the biggest processing for Bitcoin payments. But after they tried to mislead people into promoting SegWit2X, the legendary tweet of Nicolas Dorier put start of BTCPayServer development.
This is lies, my trust in you is broken, I will make you obsolete
— Nicolas Dorier (@NicolasDorier) August 18, 2017
For the last 5 years, BTCPay Server has become a truly top-notch solution for accepting Bitcoin payments along with major Altcoins. In case you do not feel tech-savvy enough to setup your own gateway, you can always turn to our commercial crypto payment gateway solution. But if you are here for the adventure and knowledge, go ahead reading.
Implementation
As you already know, we will use BTCPay Server for our Bitcoin Gateway setup. What you can expect from this gateway:
- accept Bitcoin and Litecoin;
- accept ETH and 50+ altcoins;
- integration with your hardware wallet;
- plugins for major shopping software – Magento, Shopify, Woo, Presta etc.;
- invoicing, pull payments, payment buttons, accounting;
- POS support
Requirements
- Ubuntu 18.04 / 20.04;
- 1Ghz CPU;
- 2 GB RAM;
- at least 100Gb disk space
Installation
- Make sure that your domain or sub-domain you will use for your crypto gateway is pointed to the server. An appropriate “A” record is created within DNS settings of your domain. For our testing purpose, we will use testbtcpay.yohost.org.
- Log in under root user. If you run Ubuntu not under root, then
sudo -su - Install with commands below:
mkdir BTCPayServer
cd BTCPayServer
git clone https://github.com/btcpayserver/btcpayserver-docker
cd btcpayserver-docker
export BTCPAY_HOST="testbtcpay.yohost.org"
export NBITCOIN_NETWORK="mainnet"
export BTCPAYGEN_CRYPTO1="btc"
export BTCPAYGEN_ADDITIONAL_FRAGMENTS="opt-save-storage-s"
export BTCPAYGEN_REVERSEPROXY="nginx"
export BTCPAYGEN_LIGHTNING="clightning"
export BTCPAY_ENABLE_SSH=true
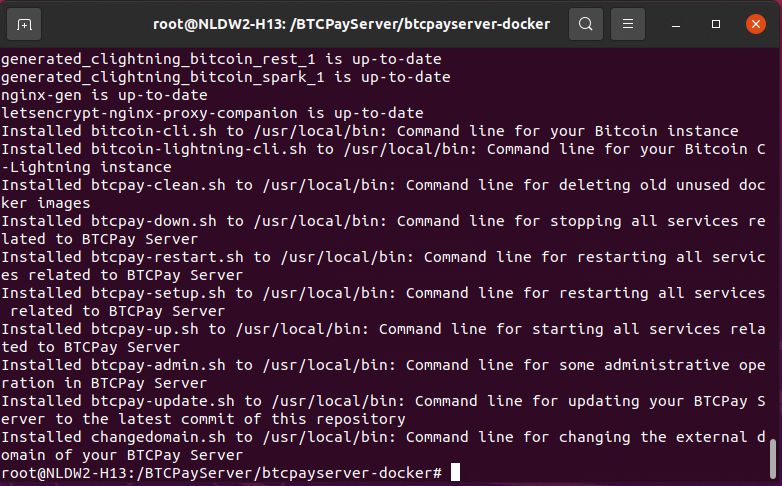
. ./btcpay-setup.sh -iCommands above will install all required utilities and start BTCPayServer. opt-save-storage-s defines how many blocks of Bitcoin blockchain will be stored on the server. Read here for more info: https://docs.btcpayserver.org/Docker/#generated-docker-compose
SSL
You might need to manually re-run Letsencrypt to ensure your BTCPayServer crypto gateway is secured with SSL. Run the commands below.
cd btcpayserver-docker
docker restart letsencrypt-nginx-proxy-companion
Creating an admin user
At your first login at “testbtcpay.yohost.org“, you will be prompted to create a user.
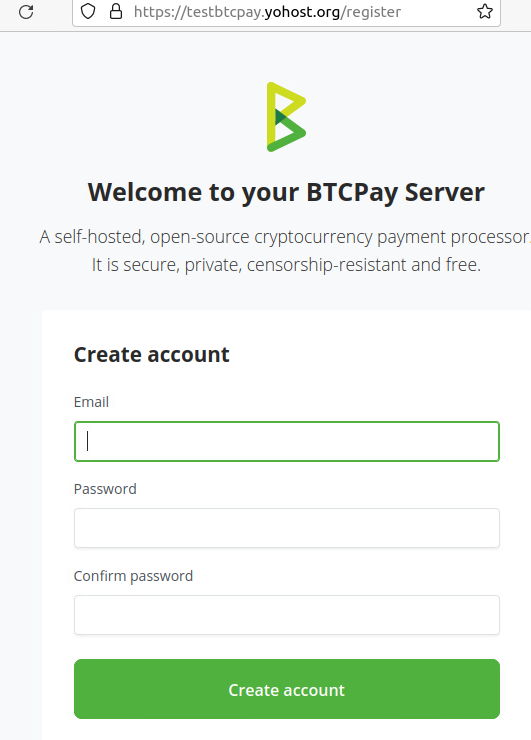
Once you create a user, you will be redirected to the admin area.
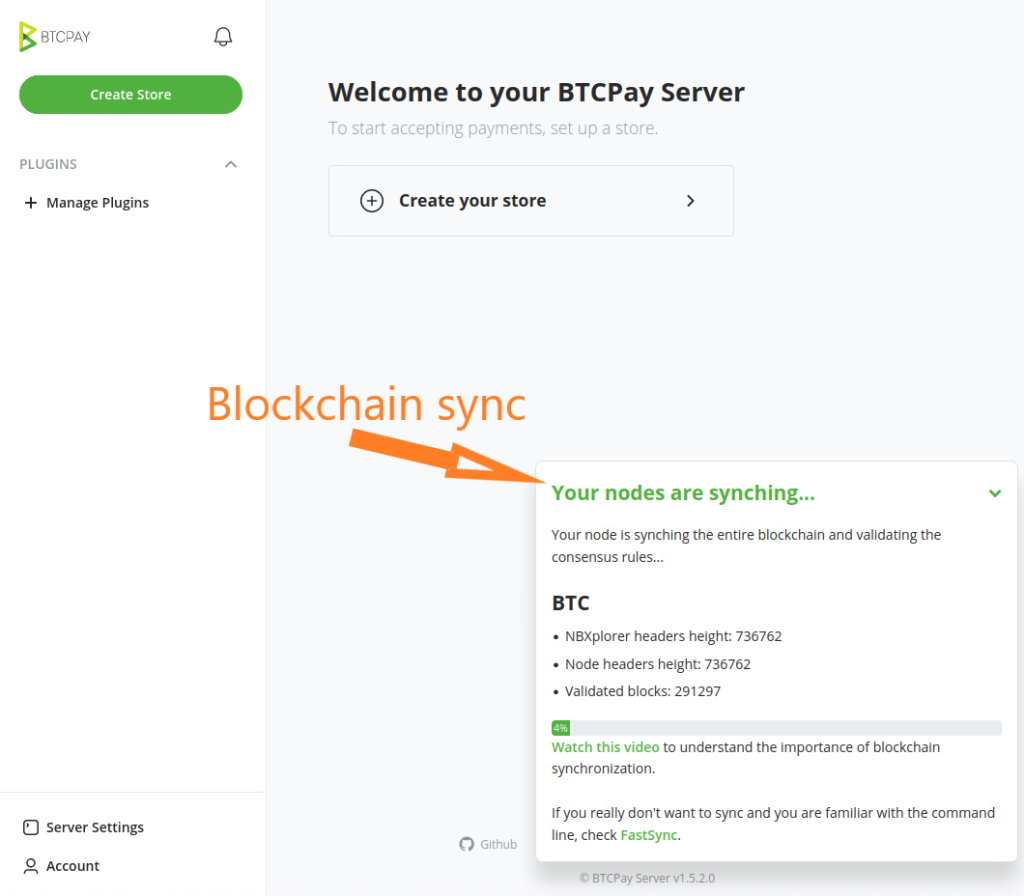
Congratulations! You have installed your own Bitcoin payment gateway. After installation is complete, your node will have to sync with the entire Bitcoin blockchain. This can take a while.
Now you can proceed creating and configuring your first store. We will cover this in Part 2 and describe how to enable ShapeShift and accept 50+ other cryptocurrencies besides Bitcoin.
Part 2
Adding website to the BTCPayServer
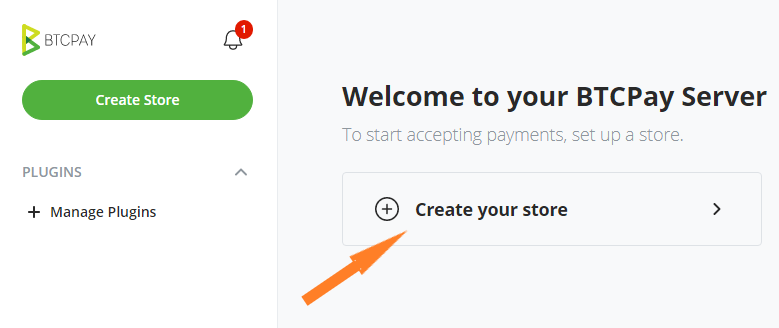
After your login to your BTCPayServer admin area, you will be welcomed to “Create your store”. This is the first step.
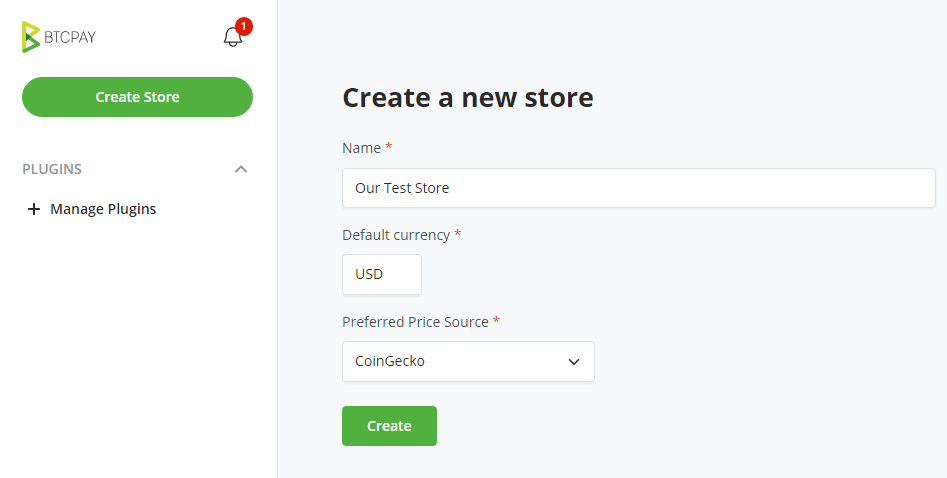
Enter your store name, select currency, the source of currency exchange rate and proceed.
The next step will be to connect your Bitcoin wallet to your store (or simply create new wallet), so that all incoming payments are instantly sent to your wallet.
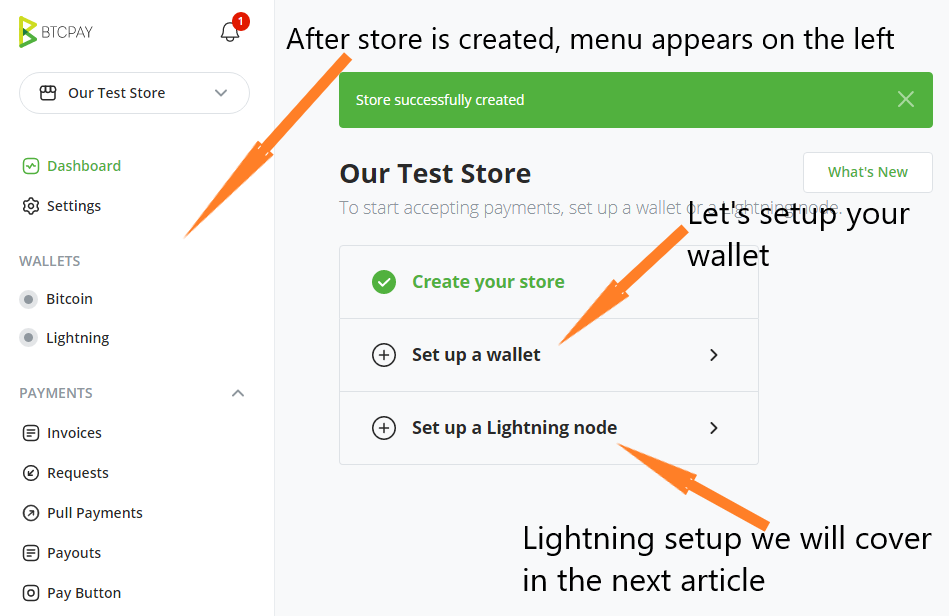
As you may notice, after we created a store, menu with many options appeared on the left. We will leave it for now as well as Lightning “thing” and focus on wallet setup.
Setup Bitcoin Wallet
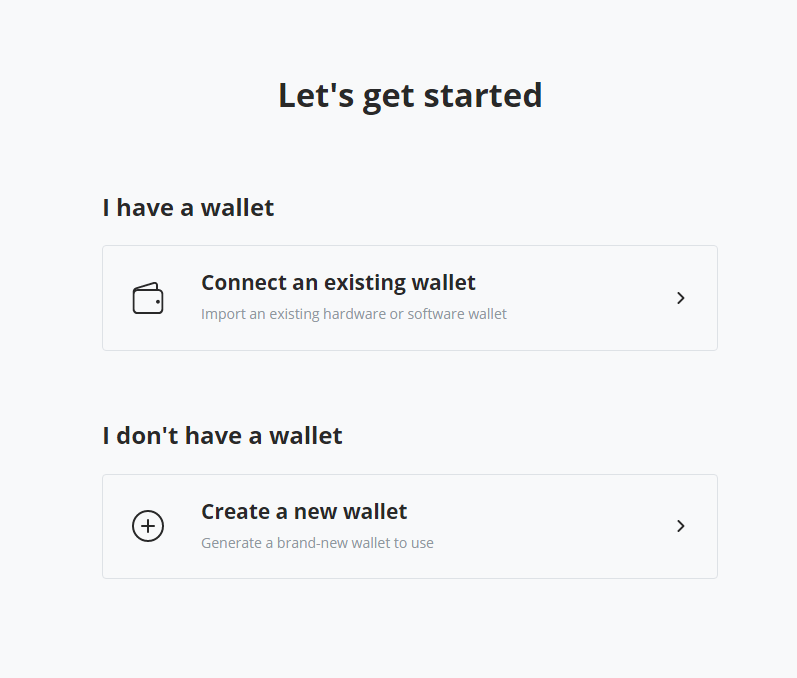
If you already have a Bitcoin wallet, proceed to “Connect an existing wallet” and you will receive an instructions on what to do next. We will assume that it’s our first meeting with Bitcoin and “Create a new wallet”. PS: Some time ago we have talked about how to create a custom Bitcoin wallet address. It’s quite fun and educational for those who want to deep dive into Bitcoin.
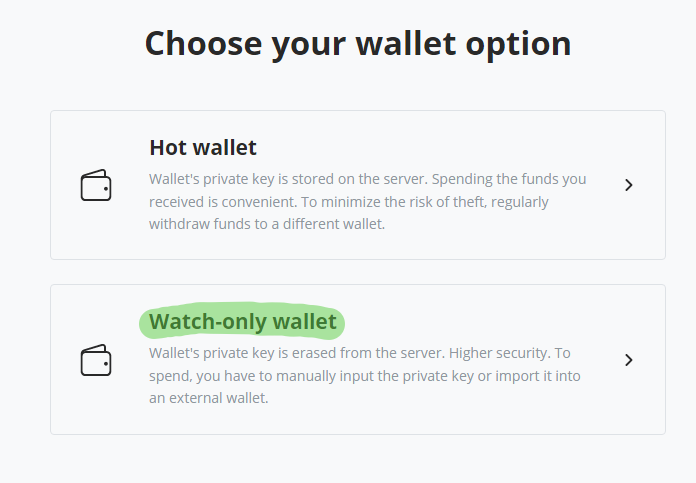
You will have an option to select either you want to keep wallet private key on the server or delete it from the server. For security purpose, we recommend to choose Watch-only wallet (highlighted in green) and keep your private key somewhere else. Private key is the key to your wallet, whoever owns it will have access to funds.
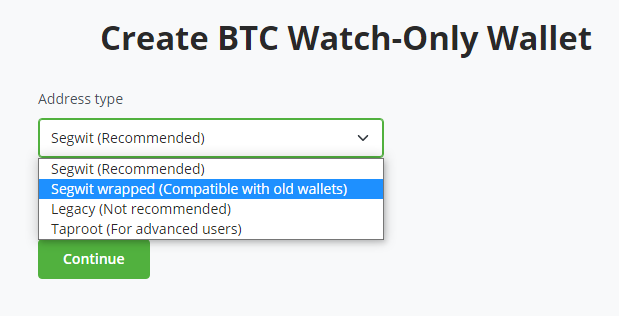
On the next step you will need to select wallet type. We recommend to select “Segwit wrapped” so that your Bitcoin payment gateway is compatible with most wallets. Otherwise, some customers will not be able to pay you. Once you click “Continue” a new Bitcoin wallet will be created and seed phrase (private key) shown to you.

It’s very important that you do not store this seed phrase anywhere online. Write it down on the paper and keep safe. Alternatively you can save it in the text file, encrypt it with PGPTool, like we described in this article and keep it offline on the USB-stick. After you press “Done“, your wallet setup is complete.
Enable Altcoins on your website
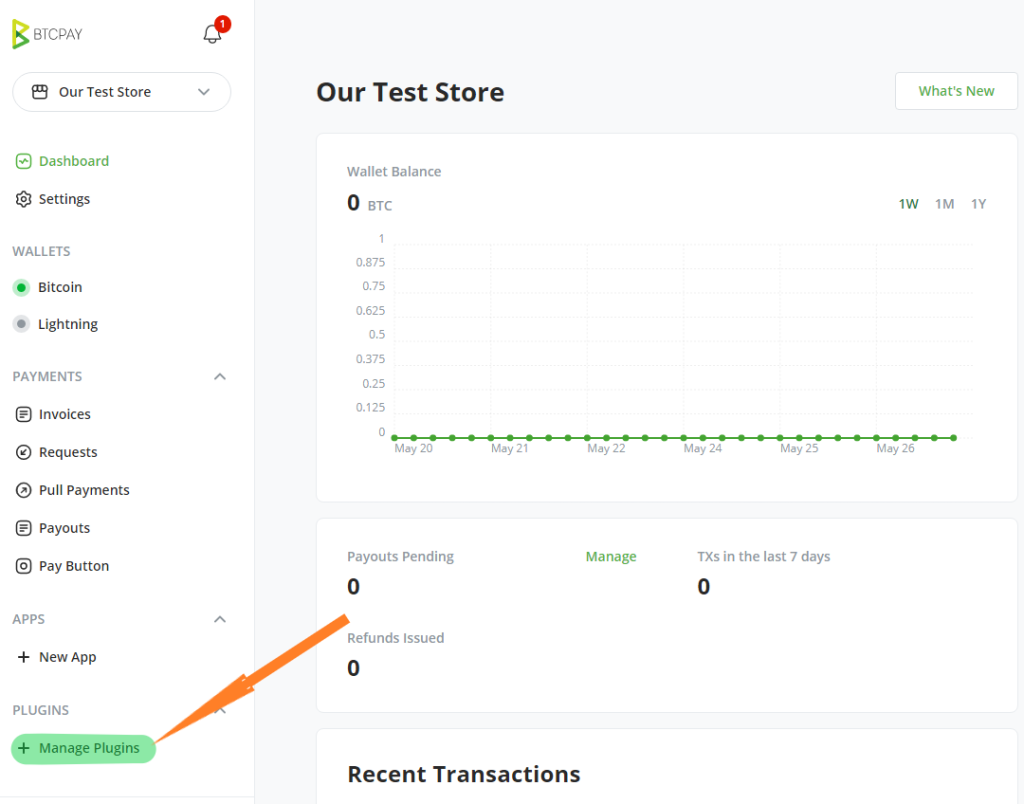
Sideshift allows you to accept 50+ cryptocurrencies on your website besides Bitcoin. To enable it we will need to install SideShift plugin for our gateway. Find “+ Manage Plugins” on the left menu and proceed to it.
Find “SideShift” and click Install.
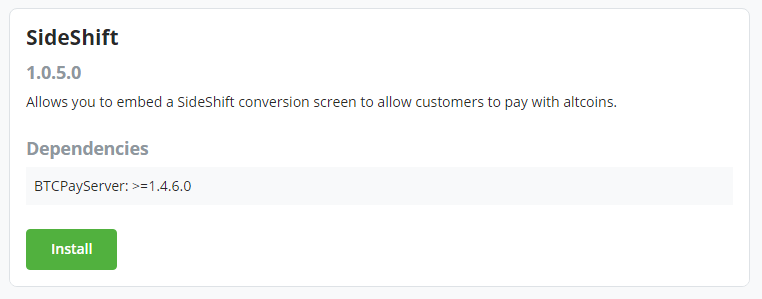
This is one click install. After it’s done, BTCPayServer will ask for reboot. After reboot find SideShift on the menu and click “Enable”.
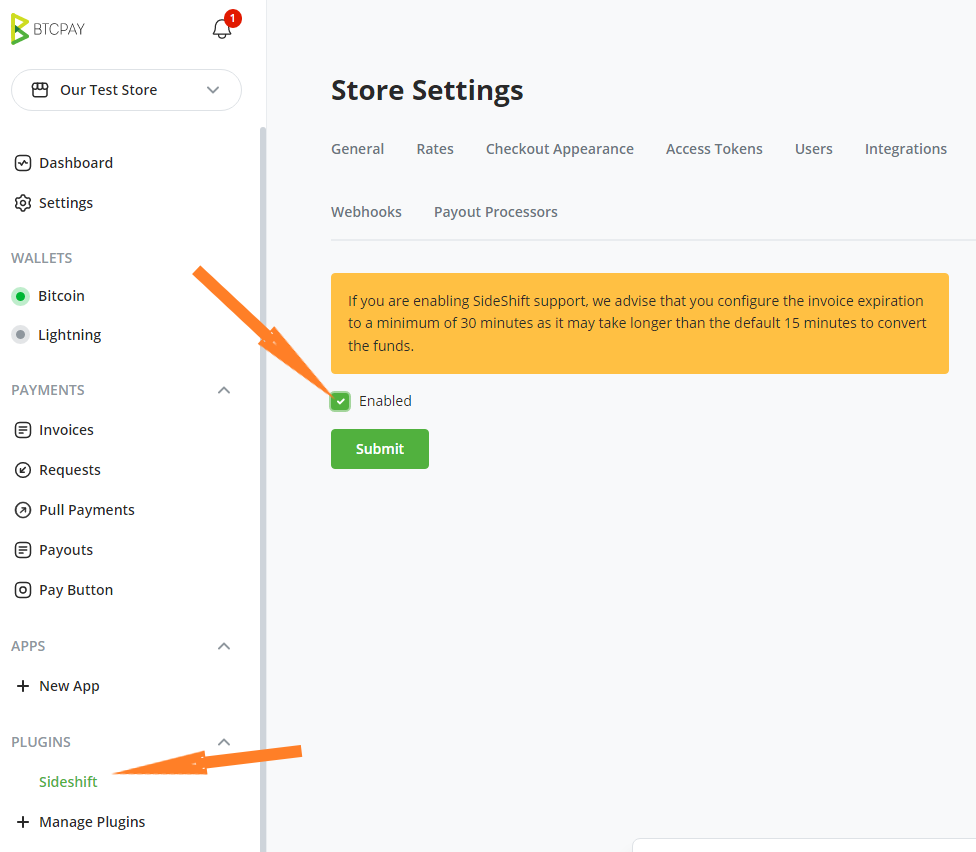
That’s it. Now during payment your customers will also see Altcoins options. We will see it on the next step, when we create a test payment request.
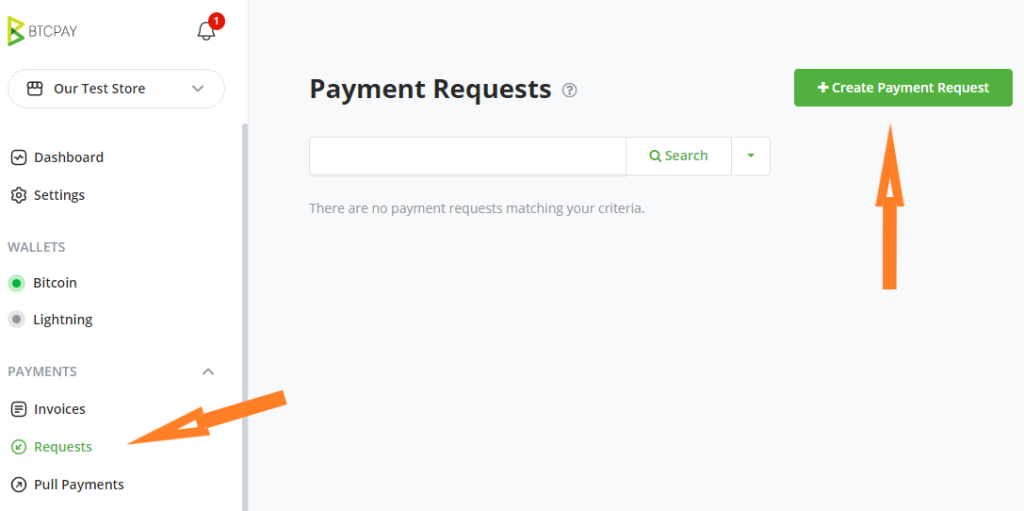
Create a Payment Request
Now it’s time to test how our Bitcoin and Altcoins payment gateway works. For this purpose we will create a “Payment Request”.
Enter title, amount and description of your payment request. Then press “Create”.
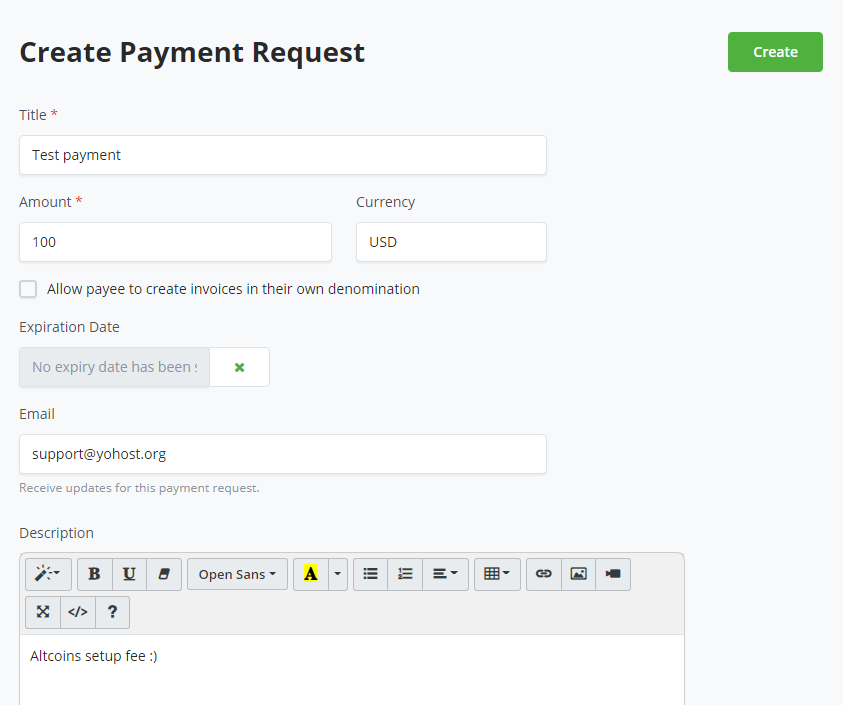
After you created the request, you will see the option to View it and try to Pay.
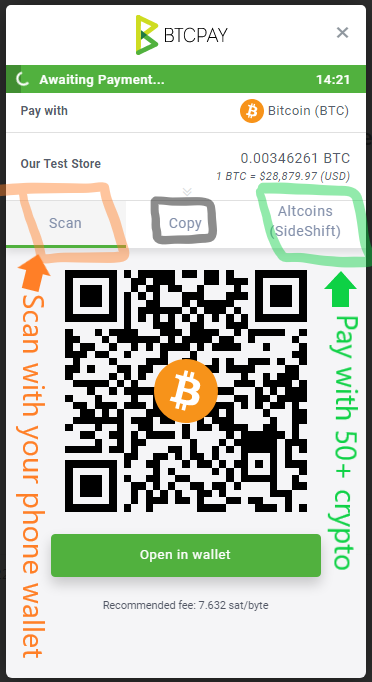
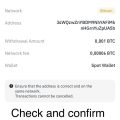
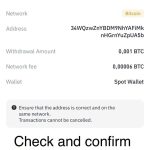
On the payment page the user will have 3 options: 1. scan QR and pay with BTC using a mobile wallet 2. copy payment data and pay with PC wallet 3. pay with 50+ cryptocurrencies using SideShift.
Conclusion
We have learned how to install own Bitcoin gateway and start to accept Bitcoin payments on your website. We have been using BTCPayServer for over 4 years since its very first implementation and we can honestly name it to be en exceptional product developed by the talented community of Bitcoin.