In this article we will show how to setup your Bitcoin wallet with Electrum. Electrum is a self-custody wallet, which gives you full control over your funds. We will setup a native Segwit and p2sh wallet which is compatible both with native Segwit addresses (start with bc1) and legacy Bitcoin addresses (start with 1).
Download and install Electrum
Electrum is available for all types of OS – Linux, Windows and MacOS. There is no Electrum app for iPhone, but there is one for Android.
Go to the official website, download Electrum and install. Make sure you use official website (electrum.org) and do not install software downloaded from some other websites as it can be injected with a malicious code.
Setting up the Bitcoin wallet
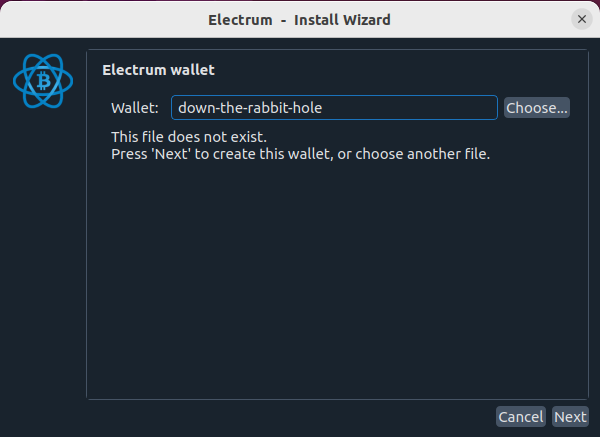
When you first open Electrum wallet you will see the image below and it will offer you to create a new wallet.

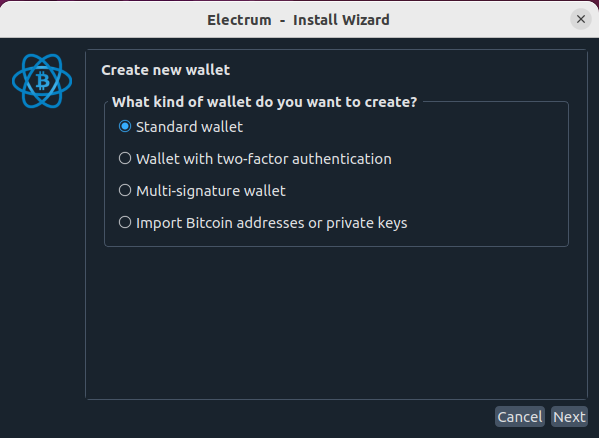
Choose the wallet name and press “Next”. On the next stage you will be able to select what kind of wallet you want to create.

Standard wallet: Our choice. Default and most popular setup, without extra authorization etc. Recommended for the first time users.
Wallet with two-factor: this type of wallet will require to sign every transaction through a third-party service which will be approved with your Google authentificator. You will still hold private keys of your wallet and can restore it with backup/restore function anytime even if Google auth access is lost.
Multi-sig wallet: *advanced* this wallet will require multiple private keys to sign the transaction. It’s good if you share a wallet with a trusted party, like your spouse for example or business partner.
Import Bitcoin addresses or private keys: This option allows you to import existing private keys to the wallet

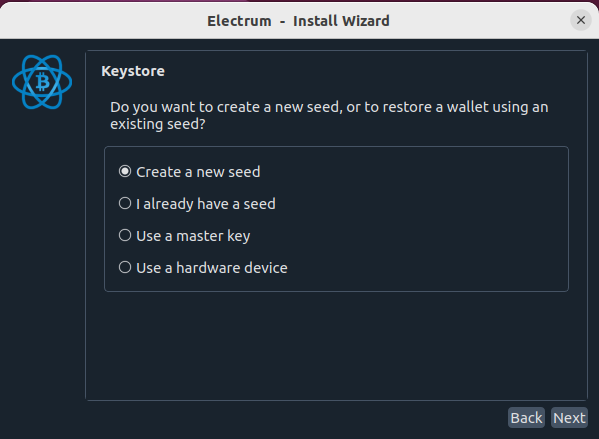
Click “Create a new seed” and in a few moment your private key containing 12 words will appear. IMPORTANT: This private key is the key to your wallet. The one who has the key, has full access to the wallet and funds on it. Write it down and store offline.

On the next step the wallet will ask you to re-type the words in order to verify that you have saved them.
Finally enter the password for your wallet to prevent unauthorized access to your wallet and keys. This password is only required for wallet startup and is not required for wallet restore. In case you want to restore wallet on another PC, for example, you will need only those 12 words.

You have finished your wallet setup.
How to create P2SH Bitcoin wallet Electrum
The setup described above will get you a bech32 or native Segwit Bitcoin wallet. In case you want to create P2SH wallet, you will need to restore wallet with your newly created private key (seed phrase).
Start like if you want to create a new wallet.

On the next screen, select “I already have a seed”.

Enter the seed phrase you created previously and click on “Options”. Select BIP39 seed. Electrum will show a warning, just ignore it.

On the next step, you will be offered to choose the derivation path and this is where you choose p2sh-segwit.

On the next step, you will be able to create a password to encrypt your wallet as usual. To verify that your wallet use p2sh, go to “Addresses” tab of your newly create wallet and you should see addresses start with “3“.

This is it on how to setup your Bitcoin wallet with Electrum. We recommend to stick with p2sh wallets so far as they can send and receive money both to legacy Bitcoin addresses and native Segwit addresses.


