In this article we will cover how to create a virtual machine (VM) in VMware vSphere 7, install the OS and convert it to OS template for future use. This article will consist of three parts.
- Part 1: Creating a Virtual Machine (VM)
- Part 2: Installing an operating system (OS) of your choice.
- Part 3: Creating a template out of the installed VM with OS.
Creating a VM
- Download the image of the OS you want to create a virtual machine (VM). In our example, we will create a template for Ubuntu 22.04 LTS. [download] . If you want your VM to have graphic interface, use desktop version, otherwise use server image.
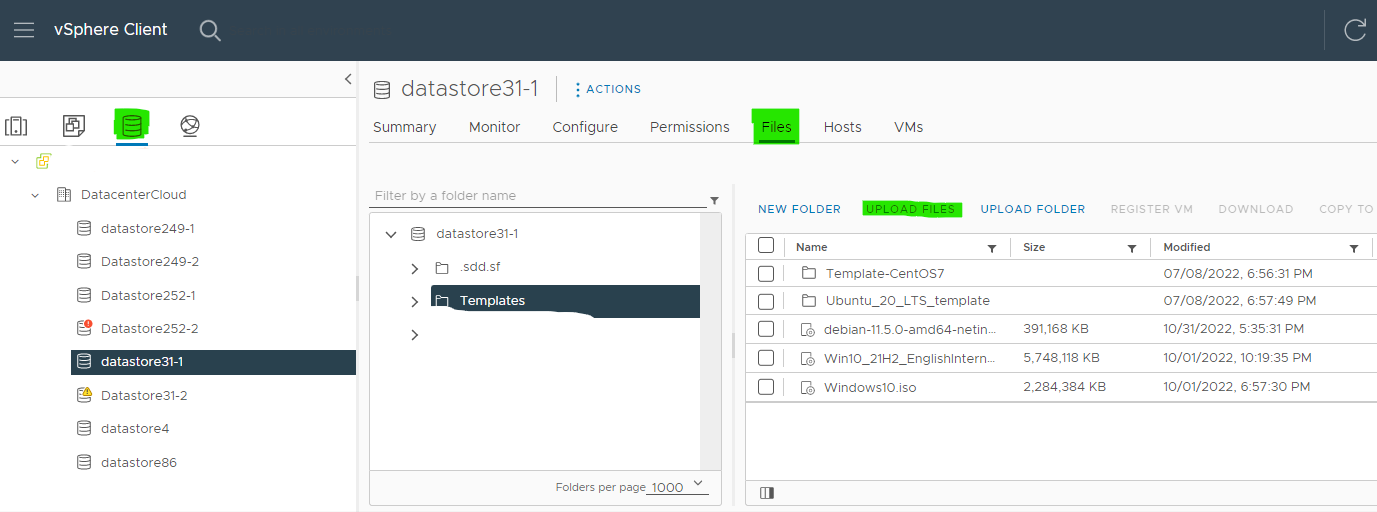
- Upload the image (ISO) to the desired datastore in vSphere (see image below)

- Create VM and connect installation image to the VM.

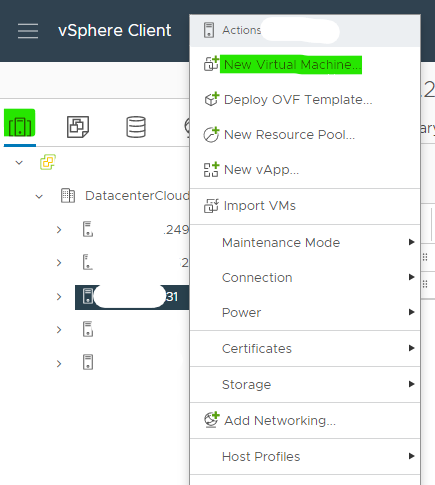
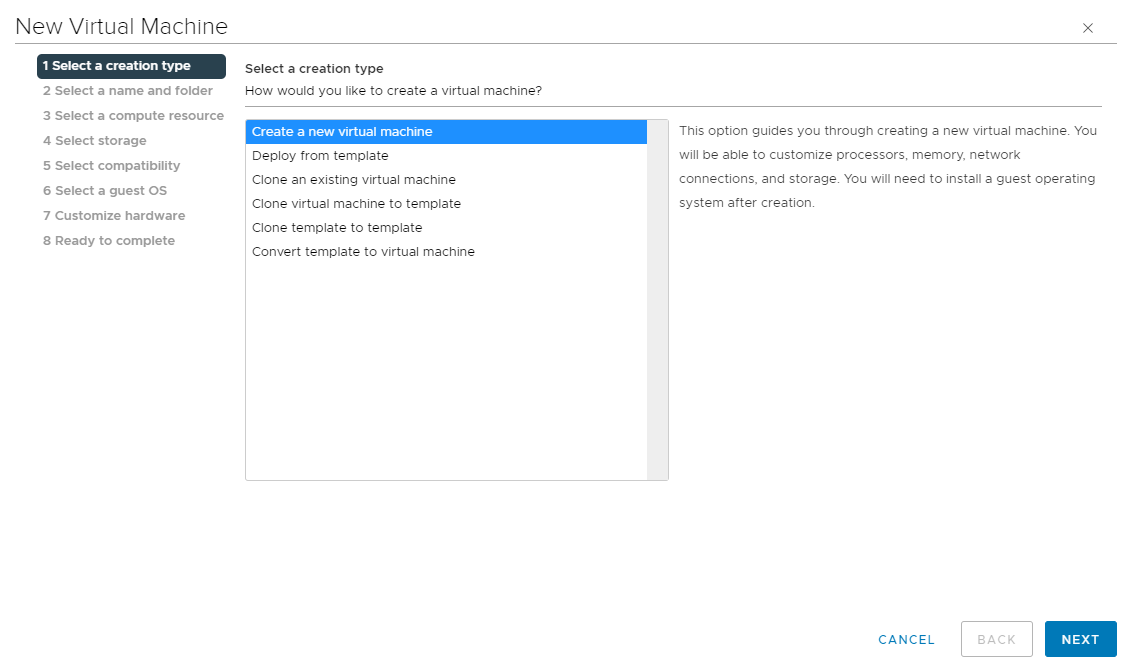
Select, “Create a new virtual machine”.
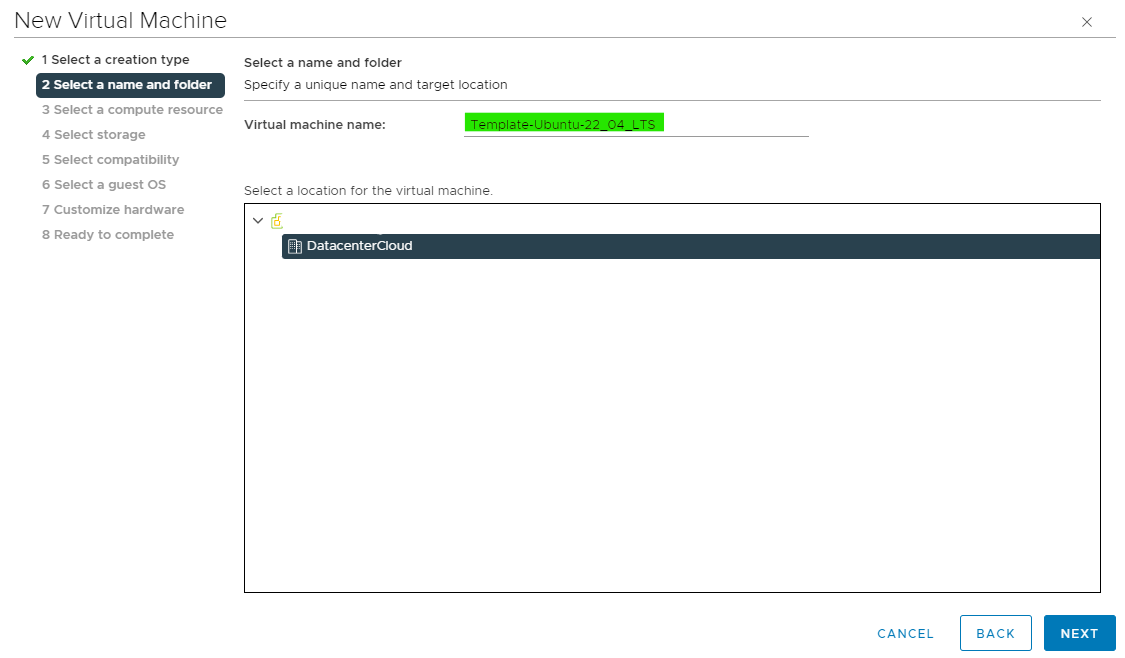
Enter the name of your future template:
Select the server, which will host the current VM:
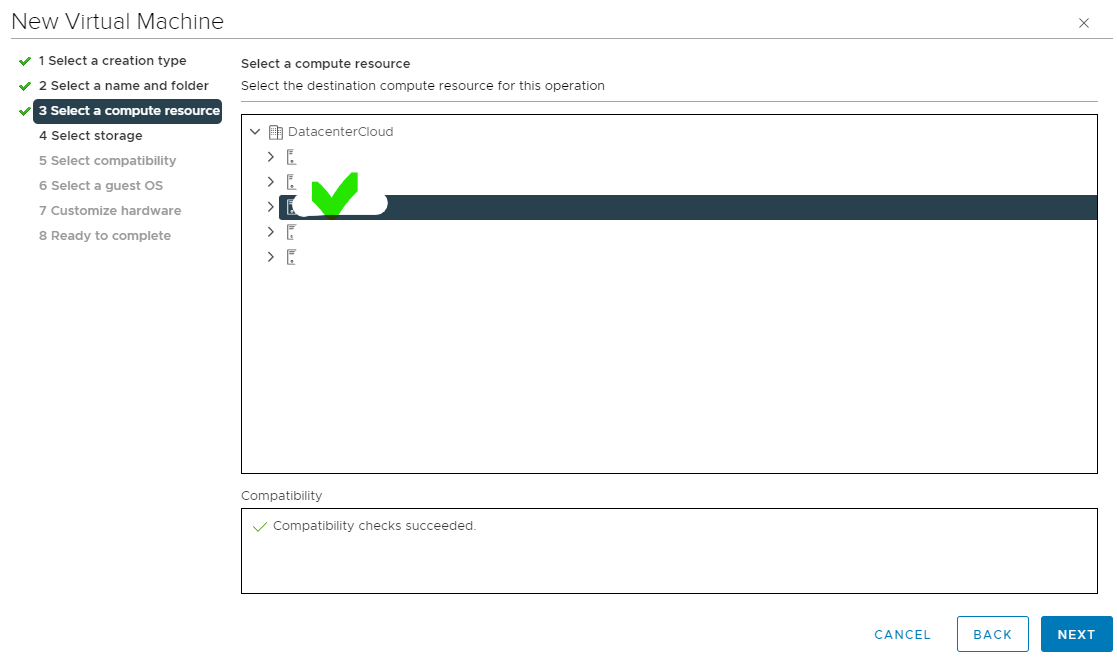
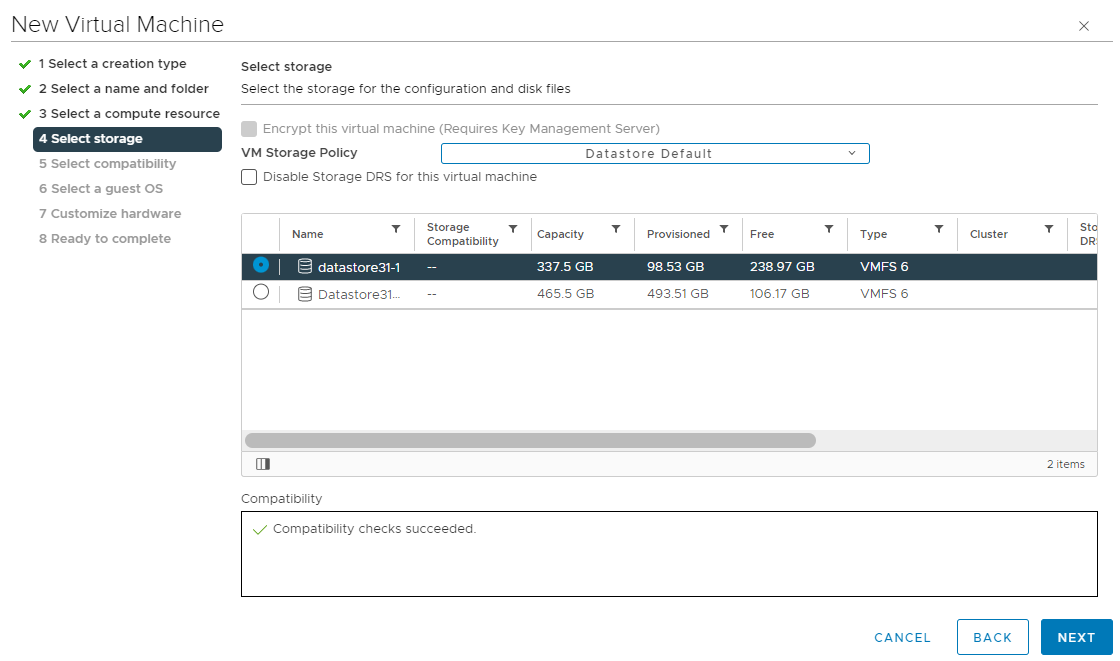
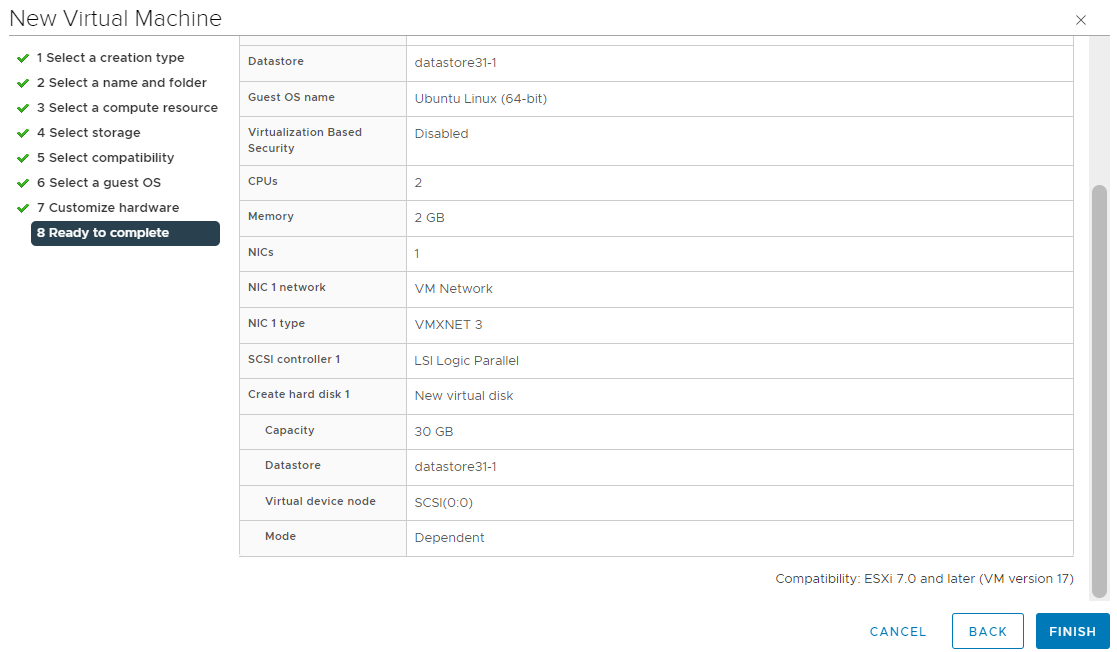
Select the datastore (in case your server has multiple drives):
Step number 6: Select compatibility. Simply choose the ESXi version your host is running. We run latest 7.+, so we will chose this one.
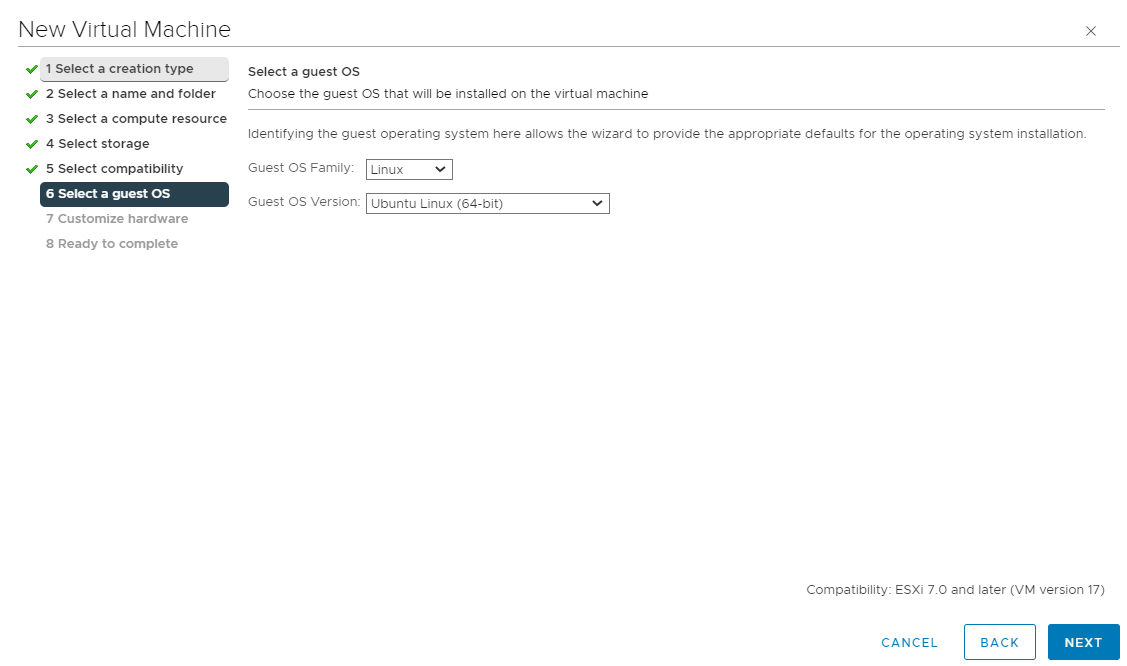
Guest OS. Select the OS which will be installed on the VM.
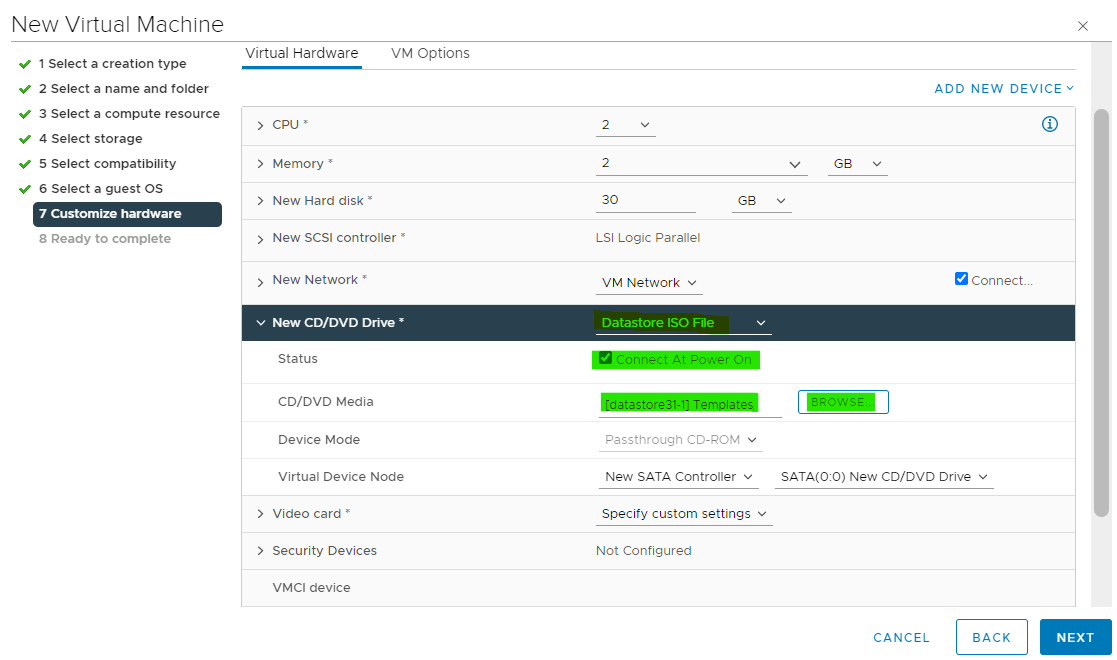
Customize hardware. 1. The settings you set on this step will be minimum possible settings for your future VMs created with template we are going to make. For example, if you set 4GB RAM for you VM, you will not be able to create another VM with this template with 2GB. 2. Under new hard disk, note there are two options of provisioning the disk space. Thin and thick. Thick means that the disk space is hard reserved for this VM. Thin means that disk space will be allocated on demand but limited by the settings you define. 3. If you want to use graphic interface for your VM, make sure to select 3D support in the Video card settings and allocate more video memory, like 256Mb.
Final check and confirm.
Installing an operating system (OS)
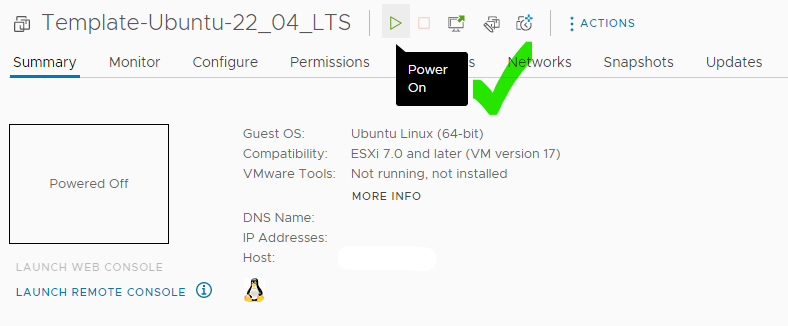
- Power on the VM:

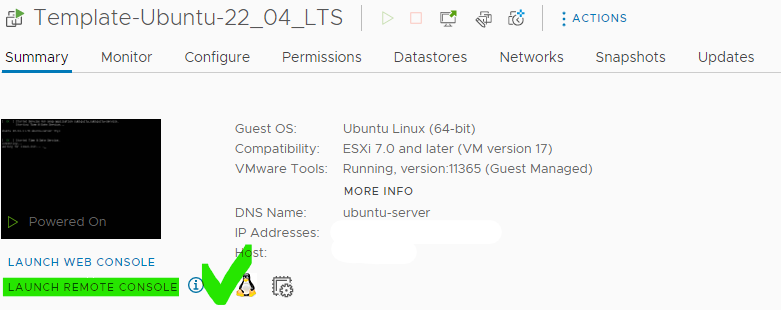
- Now it’s time to connect to our created VM via console and proceed to the OS installation. We have connected the OS ISO, so installation welcome screen will be awaiting us on the VM boot. I prefer to use VMRC rather than built-in browser console to access the VM. VMRC can be downloaded on the official VMware website [download].

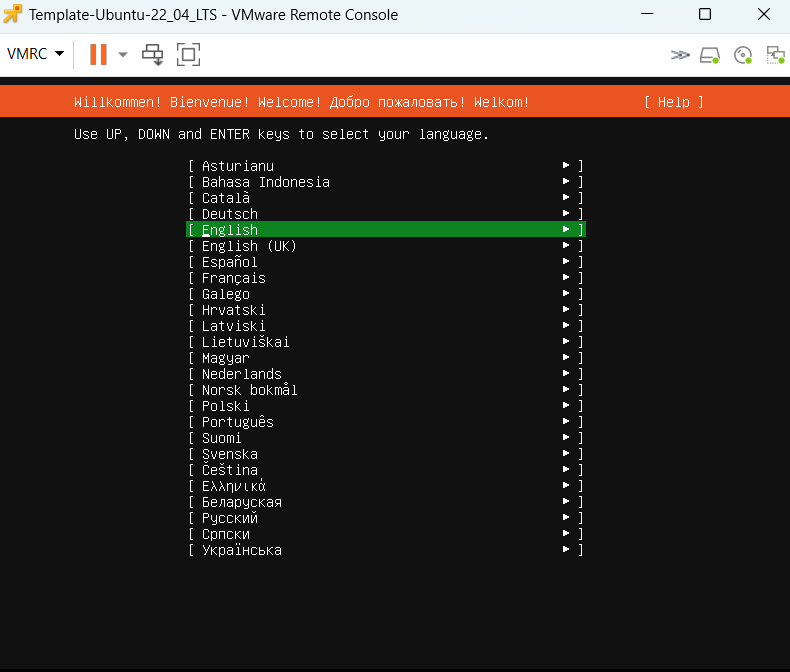
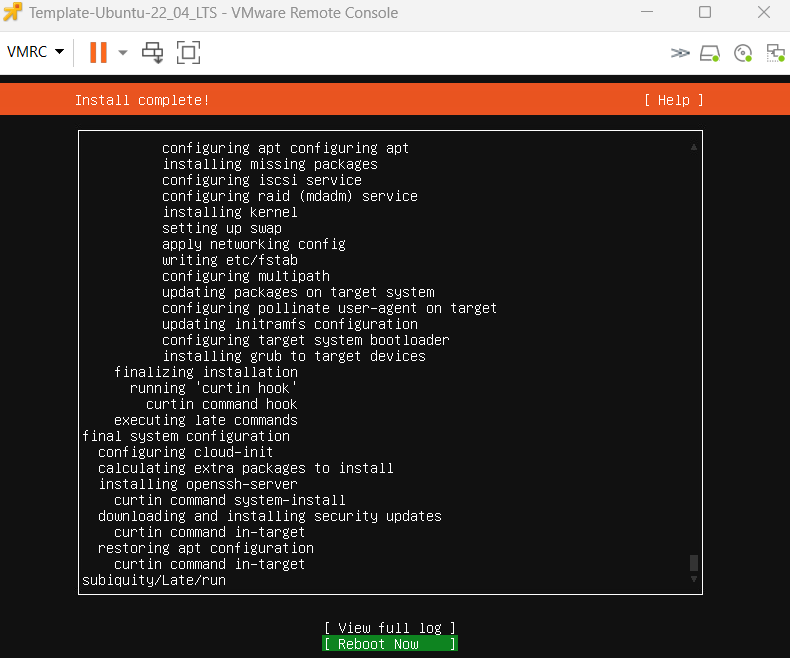
- Install the OS. We cover this pretty much in our another article (encrypted Ubuntu installation). Yes, it’s more focused on encryption but nonetheless it covers all installation steps. Below you can see the welcome screen after you access your VM via VMRC.

- Once installation is complete, reboot and power off.

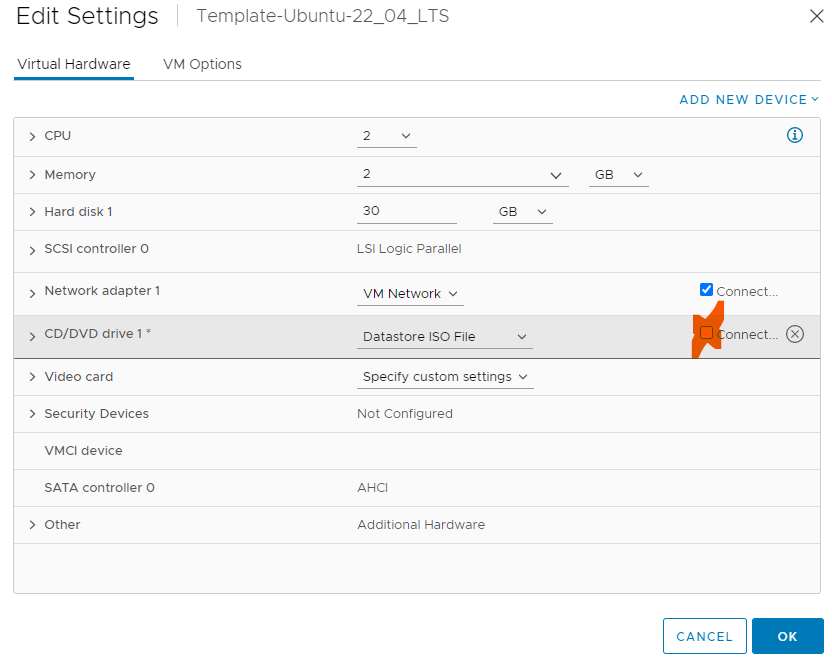
- Edit Settings of the VM to unmount ISO. Otherwise it will prevent OS to boot normally.

- Boot the VM.
- Install vmware-tools
sudo apt install open-vm-tools - Power off the VM.
Creating a VMware template
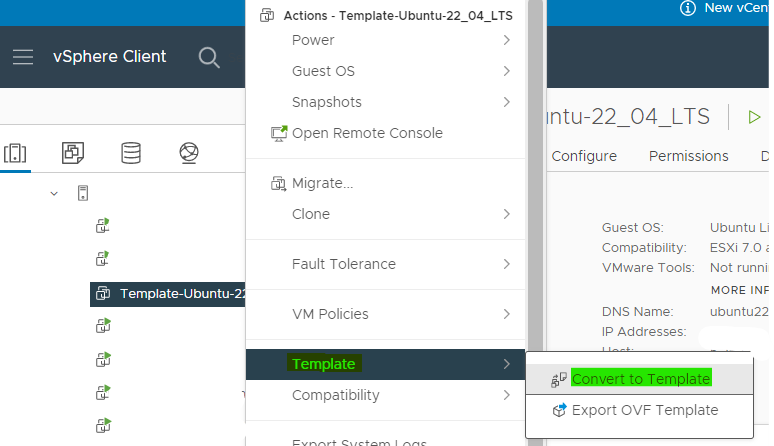
Now the easiest part. Let’s convert our newly created VM with installed Ubuntu 22.04 OS to a VMware template. For this simply, right click on the Virtual Machine > Template > Convert to Template.
After you confirm the action, VM will be converted to template. VM itself will disappear. So, do NOT create templates out of existing VMs!
VMware environment can be difficult to learn at the beginning due to it’s numerous possibilities. But once you go for it, there is no way back because you will understand how versatile this system is and which perspectives it opens for you as an IT infrastructure service provider.