Problem: Often public VPN services become a victim of hackers attacks – NordVPN, SuperVPN, LimeVPN were hacked and various data leaked.
Solution: Running a private VPN server for your own use almost nullify risk of hackers attacks because it stays under the radar.
For the convenience of use, this article is divided into 4 chapters.
Content
Prerequisites
Server: VPS with at least 1Gb RAM
OS: Ubuntu 20.04 LTS
VPN server software: Pritunl OpenVPN (repositories)
We will be running Pritunl server on the LUKS encrypted Ubuntu setup to maximize security. You can read here, how to setup it or you can use regular Ubuntu 20.04 LTS without encryption.
Installation
We perform this installation under regular Ubuntu user (not root). As a result, we use sudo before every command. If you are using root access for your installation, you will run below commands without sudo.
Adding repository and keys
- ubuntu 20.04
- ubuntu 22.04
Ubuntu 20.04
sudo tee /etc/apt/sources.list.d/pritunl.list << EOF
deb http://repo.pritunl.com/stable/apt focal main
EOF
sudo apt-key adv –keyserver hkp://keyserver.ubuntu.com –recv 7568D9BB55FF9E5287D586017AE645C0CF8E292A
Ubuntu 22.04
sudo tee /etc/apt/sources.list.d/pritunl.list << EOF
deb http://repo.pritunl.com/stable/apt jammy main
EOF
sudo apt-key adv –keyserver hkp://keyserver.ubuntu.com –recv 7568D9BB55FF9E5287D586017AE645C0CF8E292A
Update and install
sudo apt-get update
sudo apt-get install pritunl
systemctl start pritunl
systemctl enable pritunlMongoDB. Pritunl uses MongoDB, so we need to install it as well.
- Ubuntu 20.04
- Ubuntu 22.04
Ubuntu 20.04
sudo apt-get install mongodb-server -y
systemctl start mongodb
systemctl enable mongodb
Ubuntu 22.04
sudo tee /etc/apt/sources.list.d/mongodb-org-6.0.list << EOF
deb https://repo.mongodb.org/apt/ubuntu jammy/mongodb-org/6.0 multiverse
EOF
wget -qO – https://www.mongodb.org/static/pgp/server-6.0.asc | sudo apt-key add –
sudo apt -y install mongodb-org
sudo systemctl start mongod
sudo systemctl enable mongod
Configuration
After you completed the installation step, you are ready to navigate to https://your_server_ip for initial configuration of Pritunl VPN server.
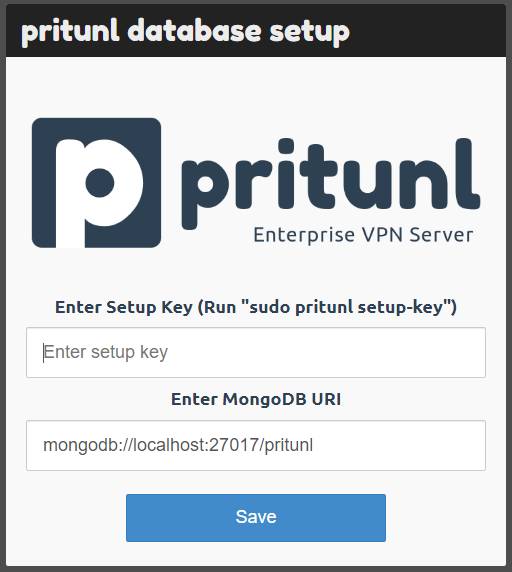
Once you navigate to https://your_server_ip, you will see the above image. You will be requested to enter your Setup Key. The key is generated by running the below command on your server (Picture 2).
sudo pritunl setup-key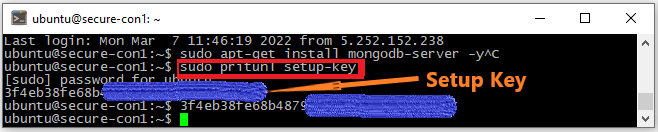
After you proceed with your Setup Key, the system will ask you to run another command to retrieve default admin login details.
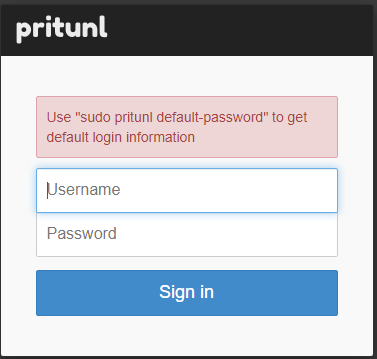
sudo pritunl default-passwordPritunl will generate you new login details and now you are able to login with them. After you log in, you will be greeted with the below window.
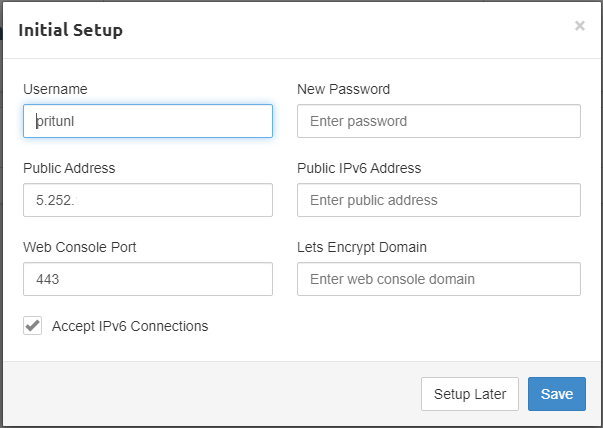
You can set new user and password, enter IPv6 address and enter public domain (if any) for which the server will issue SSL certificate. Click “Save”.
Next step is to Add Organization, Add User and Server.
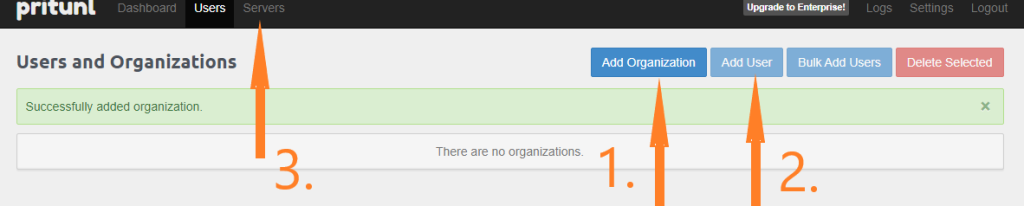

For organization simply enter any name you want, like MyPrivateVPN and click Add. For User, add your preferred username (we used “admin”) and select organization (you just created). Email and PIN are optional. PIN works like 2-factor authentication. Finally, go to “Servers” > “Add Server“.
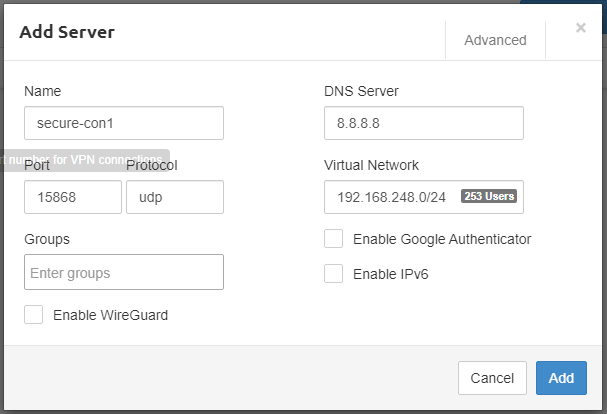
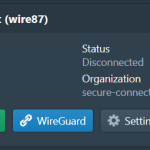
In the top right click “Advanced” and mark “Block Outside DNS“. This will prevent DNS leak on Windows clients. We recommend enabling WireGuard since it’s a new new modern VPN protocol (much faster than OpenVPN). Here we describe how to enable WireGuard and configure Pritunl client.
Click “Add“. Final step is to attach server to organization.
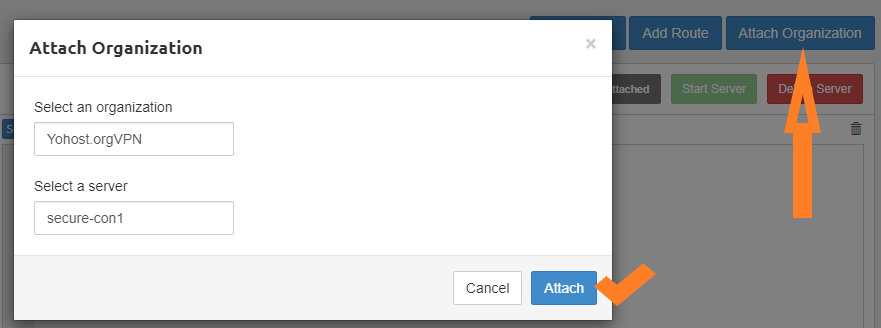
After Server is attached to the Organization, click Start Server.

Congratulations, you have completed the setup of your private VPN server!
Connect to VPN
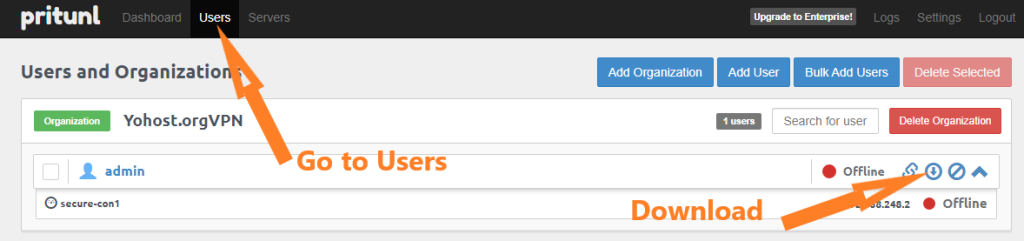
Now in order to connect to you private VPN you will need to download your user profile. Go to “Users” and “Download“, like it’s shown on the Picture 10 below.
Ok, now when you have your VPN server running, your user profile downloaded, you only need to get Pritunl Client, Import profile and Connect. All these steps have been covered in our previous article – How to Connect to OpenVPN using Windows Client Pritunl.